CQJP July Block

Sunday, November 13, 2011

Surprises and Stitching on Sunday

I found a delightful surprise in the mailbox this week from Shirley in Australia. Look what she sent me:


A lovely card congratulating us on the birth of our first grandchild, a beautiful granndaughter


Did I tell you? DD gave birth to a beautiful, healthy girl mid-October. I'm a Grandmother! DD and family live half-way around the world in Australia.  sigh.


a wrapped Christmas gift to put under our tree
no peeking!
and my first Baby Brag Book! I'm waiting for pictures so I can fill the pages


Thank you so much Shirley for being so thoughtful!


So, I've been making a few cards for Babies:


This one is on its way to England, for a baby boy who will arrive in December

I painted the background, embroidered, stamped, stitched, and tatted


and tucked this tatted heart inside


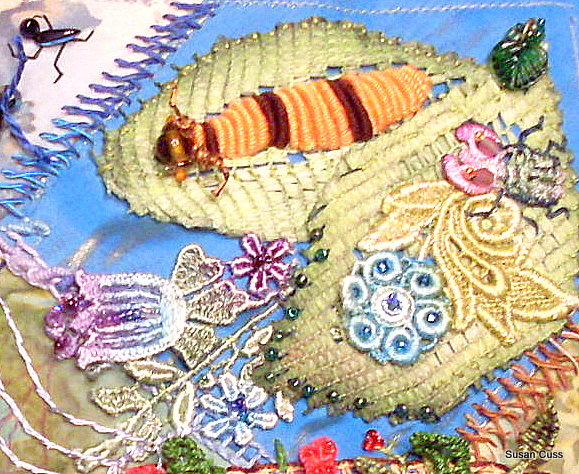
This one is traveling to Australia to welcome Jewel into our family.


I found this copy of Workbasket in the local second-hand shop.
It 's from April 1954, and has an unusual tatted doily pattern. I'm testing it.


I also came across this booklet which has several tatting patterns I'm looking forward to trying.


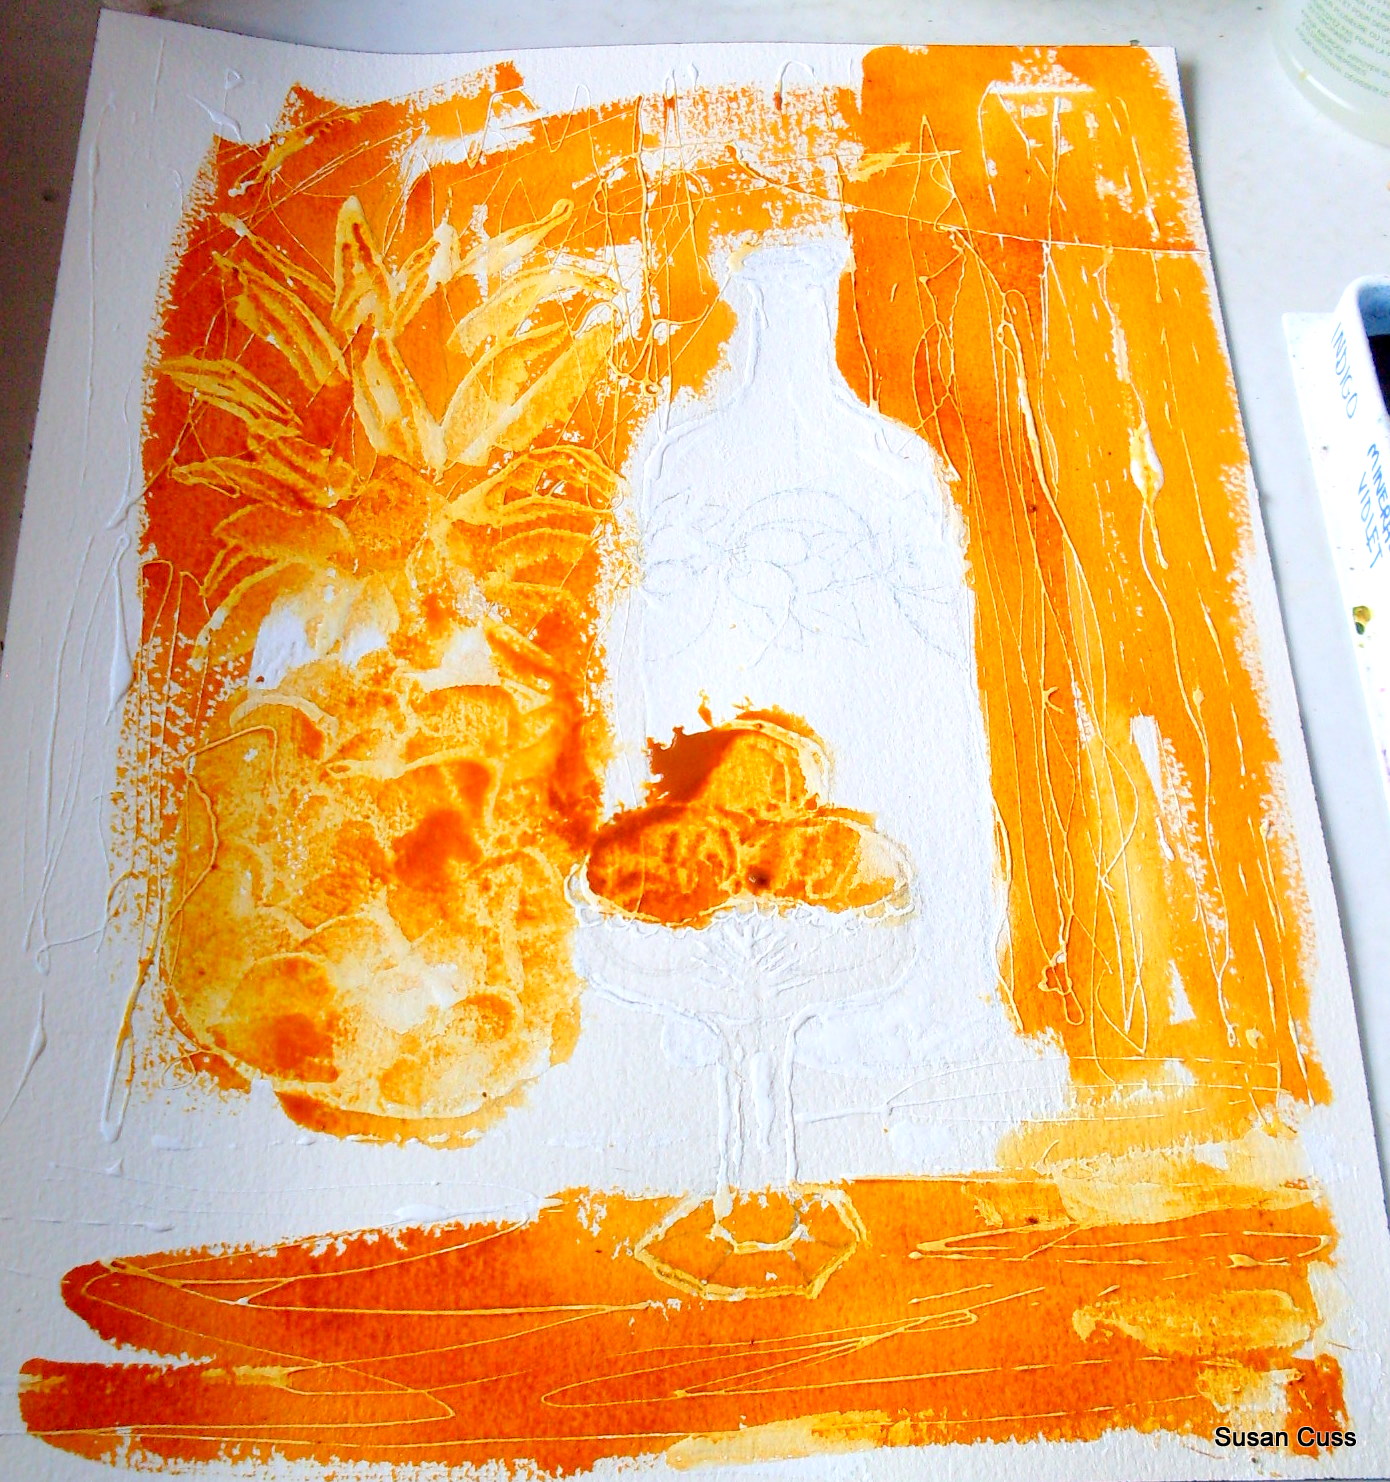
The week has been grey and overcast, so I was unable to take pictures for my glass subject for Sunday Inspirations. The sun finally showed itself yesterday.


 It began to softly glow on turtle island


 crept further onto the shore


 then set the bay ablaze!


 what a glorious sight.


 I then snapped a few unusual glass shots. I'll be working on the painting during the coming week.
What projects will you be doing?
Thanks for visiting.
Hugs from Suz

Thursday, November 10, 2011

Remembrance Day

Remembrance Day  November 11, 2011:   11/11/11


On the 11th Hour, Of the 11th Day, Of the 11th Month......


In Remembrance and with Gratitude.  For those who have served, those serving now, and those yet called to serve. Bless you and Thank you.

Sunday, November 6, 2011

Inspiration Sunday November 6, 2011

Happy November!
It's not quite as cold this morning at -2C. And the sun is shining. Hope you're having sunshine, too.

The Challenge:-
card 1:-coat your paper with gesso and allow to dry thoroughly. Apply a second coat, creating texture effects. Dry, then choose a color scheme, and subject
card 2:- paint an analogous color scheme using the colors between and including red and yellow. Add a complement to one of the colors as a surprise.

This seemed a little too much like last week's challenge once I began.


dripping


spreading


textures into the gesso and printing


 1st layer of colors


the gesso dulled and lightened the colors, and I discovered that each new layer of paint I brushed onto the gesso, removed some of the paint underneath


adding the complement to the red: green


I added sprays of the paint colors to deepen the shades and to encourage color blending


I shall wait until this has thoroughly dried, and then I may add some inks to define areas and edges. Right now I'm feeling rather ho-hum about this painting.

 So, heres a pic of a card I sent out in the mail last week. I added tatted flowers to the plants in front. but forgot to take a pic of the finished card. Argh


 The Next Challenge:-
card 1:-  choose your favorite color, and create a painting using different hues and values of the color. Use also the color you like least.
card 2:- paint glass arranged in an interesting way.


a shot of the lake this morning

the water looks grey and cold


Hope you're having a nice Sunday!

Thanks for visiting.
Hugs from Suz

Sunday, October 30, 2011

Inspiration Sunday October 30/2011

Happy Sunday!

Shirley and I had a great week together, sewing, knitting, tatting, stitching, and painting.

My Challenge
For any new followers, I am  creating a painting, hopefully each Sunday, following the Artist's Muse by Betsy Dillard Stroud. Each week I choose 1 or 2 cards from the three decks of cards included, and follow the instructions.
card 1:- Set up a still life. Paint it abstractly
card 2:- use a sgraffito technique: coat your paper with gesso. Lay down 5 layers of paint, scraping through in places to show the previous layer. After the final coat has dried, you can glaze the entire surface with transparent paint.

My inspiration

 The sketch
 adding gesso


1st color
quinacridone gold


I scraped some gessoed areas and lines to reveal the white beneath


2nd color
indian yellow


more scraping


3rd color

blended greens


I deepened the green in areas to add shaping, shadows and pattern, followed by more scraping


fourth color
mineral violet  to add more shadows and some darks


 final color
red  to shape the oranges and add more shadow


It's not really an abstract, nor realism either, but perhaps a little of both in a stylized way.
As the paper became rather delicate from all the scraping between layers, I added successive paint layers in limited areas.
This was a fun experiment, and I enjoyed painting over the gessoed doodles and runs on the paper, but it did take a long time to dry after each paint layer, in order to ensure scrapability without ripping.
The Next Challenge:
card 1:-coat your paper with gesso and allow to dry thoroughly. Apply a second coat, creating texture effects. Dry, then choose a color scheme, and subject
card 2:- paint an analogous colr scheme using the colors between and including red and yellow. Add a complement to one of the colors as a surprise.

outside, the toadstools are popping up here and there


wishing you all a safe and
Happy Howlowe'en!!!
Thanks for visiting.
Hugs from Suz

Tuesday, October 25, 2011

Tatting for Texas

Some StitchMap members lost everything in the recent fires in Texas. StitchMap has organized stash replacement and requested Christmas tree decorations, so I've been tatting:

from Rosemarie Peel, this heart is a nice and easy tat. I've added beads for a little glitz and sparkle, and used DMC perle, #12. Each tat is ~ 2" square.

Oops, looks like I added an extra chain, too! The top chain below the hanger was an extra.


Here's how the heart should look.


I added a splash of red, and a crystal drop, as well as the beads for sparkle.


I was doodling, and this decoration was the result.


I do like the crystal dangle.


This is a wonky doodle, so I'll keep it for my tree, and tat a few more.


Hope you have some time to tat or stitch today.
Thanks for visiting.
Hugs from Suz

Thursday, October 20, 2011

Stacie's Block

Thank you everyone who left such wonderful Thanksgiving wishes. We had a lovely time with our visitors, and then I took a few days off to recover. lol
I hope your Thanksgiving was a splendid one.


Stacie and I decided to do a 1:1 RR and she sent me her block:


 The color scheme?   Blue
And the theme?  Creepy crawlies!


Isn't this a nice block?


I decided to make a garden scene for the creepy crawlies


I created a thread-wrapped wire form for a tree, and sewed it to the block. Then I added lots and lots of tatted leaves to the tree branches.

I loved the tree. I was so enamored with it, I didn't notice that it overwhelmed the whole block The scale was all wrong for the block theme.


So I frogged it all! sigh.

And I began again.
This is a layered, woven and split-stitched seam treatment, with tatting on each side. The circular motif at the end of the row was added to lead the eye back around the seam, and not off the end of the block.


Created with a variegated perle cotton ( thanks, Fox!) I first stitched horizontal bars across the seam, then wrapped and knotted the thread onto each bar as I worked vertically, alternating the direction with each of the seven rows. It is thick, solid, and raised. French knots finish this seam treatment.


Doubled, variegated Lizbeth thread in 'Peacock Blue' sew these two fabrics together. I liked this effect so much, I had to repeat it elsewhere on the block.


A row of tatted leaves. Hmmm, I'm not sure I like this.


rick-rack and a 'shrub' with tatted Josephine Knot 'flower clusters' adorn this section. I added gold thread to some of the clusters to echo the gold rows in the fabric.


Don't you just love that snake? Believe it or not,  I knit the body using two tatting needles! The eyes and tongue are beaded. I like how snake is wrapped around the trunk of the shrub, and hangs off the branch looking for a meal.
 Two large, hand-painted lace leaves were sewn to the upper right, and a hand-painted lace arbor was added, with a stepping stone path
I began to add greenery between the stones, changing the size of the french knots as I moved further along the path. 


an intersection of seam treatments


 I added tatted greenery and tatted Josephine Knot flowers to the arbor, and then some woven picot stitch leaves.


French knots in browns, greens, and a bit of yellow grow
between the stones.


A bullion stitch caterpillar appeared on the lace leaf, and I added a lace flower piece beneath the leaves. Hmm, maybe that caterpillar looks more like a slug? What do you think?


a different angle


The block so far


The stones were subtly extended into the adjoining fabrics, and grasses were added for the garden setting.
The row of tatted leaves on the seam treatment  was covered with a fun trim in blues, greens and tan


adding a dyed lace flower to the hand-painted leaf


a lace bug crawling onto the lace stem


seed beads and a crystal add a bit of sparkle to the blue lace flower


a beaded spider based on the design of Shawkl's spiders as  shown on her blog post tutorial.


the spider web with a jeweled center and beaded web joins


Now I'd used what I thought was a washable pen to mark the spider web, and stitched it 3 times before the final frogging. Then I went to remove the pen marks. I scrubbed it twice. ARRGH!
Luckily, Stacie is sweet enough to overlook my faux pas, and decided the marks would be shadows. Isn't she wonderful?


other beads were added to seam treatments and the lace flower


buttonhole stitch in a dark green makes the lace bug stand out a little better, as do its beaded eyes


black ants follow the stone pathway beneath the arbor
( the ants were inspired by Allie Aller's ants in her book
"Allie Aller's Crazy Quilting")

a white inchworm keeps pace


I added brown stitching around certain areas of the arbor to make it appear more dimensional and stand away from the background, since the tones were quite similar to the stones. Brown shading was stitched around the stone's base to create the effect of shadows.


The block


Is it finished?


Well, I thought so, but then.........

I removed the metal tag on the left that didn't seem to work


maybe the right side was a little dark.....
so I auditioned some white flowers to hopefully lighten and brighten this area and repeat the light tones of the top fabric piece
The finished block


I had a little problem with the dark blue fabrics: they stretched when I used a hoop to do the embroidery. Has anyone else had that happen before? Were you able to fix it? I was so worried that the stretching would ruin the block. But, my RR swap partner is a gem.

Stacie likes the block! Yay!
It's on its way.
I can't wait to see what Stacie creates for me!

My good friend, Shirl arrives Sunday for a visit, so no Inspirations post this Sunday. I hope to have lots to show you next time.
Wishing you a warm and sunny weekend.

Thanks for visiting.
Hugs from Suz